If you’ve decided to replace the felt, it’s essential to know the ins and outs of cutting felt for your pool table properly to ensure a professional-looking result and optimal gameplay.
After all, when it comes to maintaining your pool table, one of the most crucial aspects is ensuring that the felt covering the playing surface is in top condition. Over time, felt can become worn out, stained, or damaged, affecting the quality of your game.
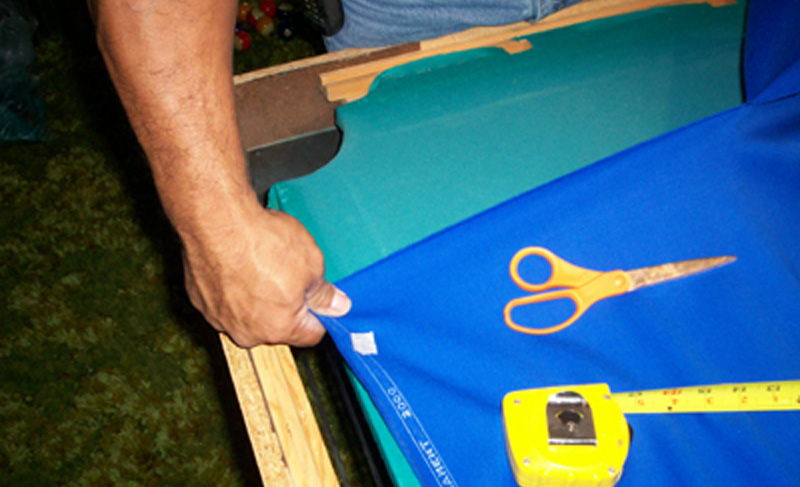
Cutting Felt for Your Pool Table
Here are some essential tips to keep in mind:
1. Measure Twice, Cut Once:
Before you even think about cutting your new felt, take precise measurements of your pool table’s playing surface.
Measure both the length and width, making sure to account for any overhang that may be required to tuck the felt securely underneath the rails.
It’s always better to have too much felt than too little, so err on the side of caution when measuring.
2. Choose the Right Material:
Felt comes in various materials and thicknesses, each offering different levels of durability and playing characteristics.
Wool and nylon are the most common materials used for pool table felt, with wool being preferred for its superior playability and durability.
Consider your budget and playing preferences when selecting the material for your new felt.
3. Understand the Nap:
Pool table felt has a nap, which refers to the direction in which the fibers lie.
When cutting your felt, it’s crucial to pay attention to the nap direction to ensure consistent ball roll and gameplay.
Typically, you’ll want to cut the felt with the nap running from the head of the table to the foot. This is the direction in which the balls will be rolling during play.
4. Use the Right Tools:
Cutting felt requires precision, so it’s essential to use the right tools for the job.
A sharp utility knife or rotary cutter is ideal for cutting through the thick felt material cleanly and accurately.
Make sure your cutting surface is flat and stable to prevent any uneven cuts.
5. Secure the Felt Properly:
Before cutting the felt, lay it out flat on your pool table surface and secure it in place using a staple gun or adhesive spray.
This will prevent any shifting or movement while you’re cutting, ensuring straight and precise cuts.
6. Cutting Corners and Pockets:
When cutting the felt around the corners and pockets of your pool table, take your time to ensure accuracy.
Use small, controlled cuts to trim the felt neatly around the edges, being careful not to cut too close to the pocket openings.
7. Check for Wrinkles and Bubbles:
Once you’ve cut the felt to size and secured it in place, carefully inspect the surface for any wrinkles, bubbles, or imperfections.
Smooth out any wrinkles or bubbles using a felt brush or squeegee, ensuring a flat and uniform playing surface.
8. Allow for Settling Time:
After installing the new felt, allow it some time to settle and acclimate to its new environment.
This will help to minimize any stretching or shifting that may occur, ensuring a consistent playing surface over time.
Cutting Felt for Your Pool Table
By following these essential tips, you can ensure that cutting and installing felt for your pool table is a smooth and successful process.
With proper care and maintenance, your pool table will provide years of enjoyment for you and your friends and family.
See it done here.